Sigmafine Server Installation
We recommend that on the Sigmafine Server machine, users install both the Sigmafine Server components and the Sigmafine Client components to insure complete installation; this is for troubleshooting purposes.
This procedure assumes the operating system has been installed and has no knowledge of a previous Sigmafine installation.
The actual installation consists of five main steps that need to be followed in the exact order in which they are listed below:
- Step 1: Install Microsoft SQL Server
- Step 2: Install PI AF Services 2018 SP3
- Step 3: Install the OEM PI Server
- Step 4: Install PI AF Client 2018 SP3
- Step 5: Install the Sigmafine Server
Step 1: Install Microsoft SQL Server
- If you already have a SQL Server available, identify that Server to be used by PI AF Services.
Note: We do not recommend installing SQL Server on the same machine as the Sigmafine Server, except when being used for only test or developing purposes.
Step 2: Install PI AF Services 2018 SP3
The following components are installed by this install kit:
- Microsoft .NET Framework 4.8
- Microsoft SQL Server 2012 Native Client (x64)
- PI AF Server 2018 SP3
- PI AF SQL server database (PIFD)
To install the PI AF Services:
- You need to accept the license terms of the .NET Framework 4.8 setup before continuing with the installation. You may also be required to reboot the machine.
- When installing the AF Server component, you are asked to confirm or change the destination folder; Pimsoft recommends using the default destination.
- The installation provides the option to select features. There are two components to the AF Server: the AF Application Service and the AF SQL Database.
- If installing the AF server with the SQL server on the same machine, both the AF SQL Database component and the AF Application Service will be installed on the AF Server machine. If installing the AF server with the AF SQL database on a SQL server that resides on a difference machine, then the AF SQL Database component must be installed on the SQL Server machine (this will be handled by the installation performed on the AF server machine) and the AF Application Service must be installed on the AF Server machine.
- When installing the AF SQL Database component on a different machine, the installation requires a sysadmin connection to the SQL Server via Windows Authentication. If there is an issue connecting to the SQL Server, the installation displays an error and the PIFD SQL Database is not created. If this occurs, the PIFD SQL Database can be installed or updated manually at a later time. For more information, please refer to the OSISoft AF Server release notes available when installing PI AF Services.
Step 3: Install the OEM PI Server
There are several options to select during the installation. The following provides a description of each in the installation sequence.
To install the OEM PI Server:
Unzip files in a particular location.
As with most of the OSISoft install kits, the first window extracts the installation files. By default, a temporary folder is selected. If you need to access these files at a later time, we recommend that you select a different path for unzipping the files.
For example: D:\Temp\OEM PI Server
During the installation, it is required to have the PI license file available in a certain location.
A temporary license file is available from the Installation CD. Please contact Pimsoft to obtain a permanent license file.
Type the name of the AF Server in the required box and click on the Connect button, so the installation can verify the connection to the AF Server.
Once the connection has been established, a message appears in the same screen, indicating “The connection to AF was successful.
Click Next to continue.
If the connection to the AF Server was not successful, the PI Server installation will need to be stopped until a later time.
You are prompted to enable the PI Module Database, select No and continue.
The destination folder is shown. This destination folder is the folder where the PI Server will be installed.
Click Next.
You are prompted to select the security options.
In the Sigmafine Installation manual it is suggested that you select Yes, to disable the password authentication for all PI Users.
Check each of the optional features.
This creates the default points which are used normally for troubleshooting. They also configure the auto start services which allow the PI Server to start automatically when the machine restarts.
You are prompted for the path where the archives are to be located.
Additionally, you can specify the size of the archive files. The default is 256 MB. Since the OEM PI server does not collect data in the archives, the size of the archives can be smaller; generally, half the size of the default size would be fine.
After the installation is complete, start the PI Server and verify no errors are present.
This accomplishes the "run once" functions performed after an installation. This step is very important, as it is required for the correct performance of the PI server.
To do this:
Log in as an administrator on the machine, if not already logged in as one.
Go to the \Program Files\PI\adm directory (folder).
Run the pisrvstop.bat file.
Run the pisrvstart.bat file.
Ensure that you run the 'pisrvstop.bat' file first, and then run 'pisrvstart.bat' file.
Note: Make sure that all the install kits are Run as Administrator.
Step 4: Install PI AF Client 2018 SP3
To install the PI AF Client:
The PI AF client installation prompts for the destination folder.
The browse button is disabled at this time because the destination folder has been determined with the previous install kits.
Select the "typical" installation.
This option is recommended for most users. This install kit selection installs the AF Software Development Kit, PI System Explorer, PI AF Builder and AF user documentation.
After the installation is done, we recommend that you check the connectivity to the AF server.
Note: The PI AF Client installation provides the option of selecting the Management Plug-In from the list of features included. This is an optional feature for the client installation only. The server installation installs this feature by default.
Step 5: Install the Sigmafine Server
This installation is for a Server machine only.
Make sure the PI AF Application Service is up and running before installing Sigmafine. One way to check this is by opening the PI System Explorer and connecting to the server. The following are some options that need to be filled out during the installation:
Run the Sigmafine Server and Client 4.7 R2.exe as admin.
The Welcome window opens.
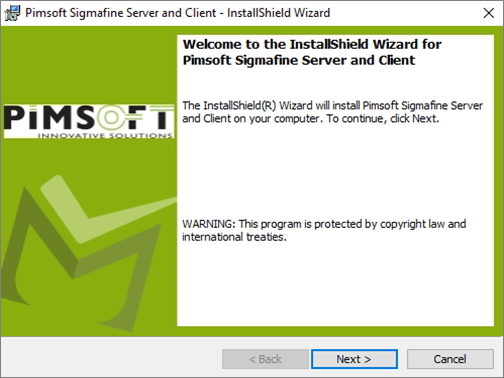
Click Next.
The Select Sigmafine Installation Type window opens.
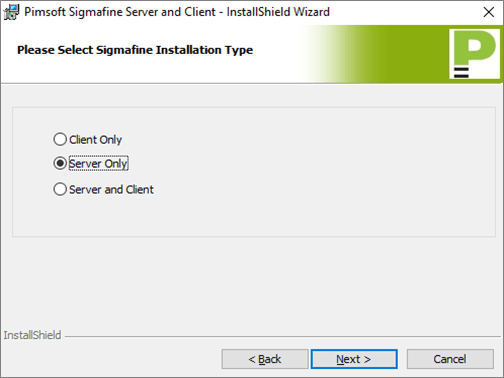
Do one of the following:
- If this installation is for a Server only, select the Server Only option for the Installation Type.
- If this installation is for a Server and Client, select the Server and Client option for the Installation Type.
Click Next.
The License Agreement window opens.
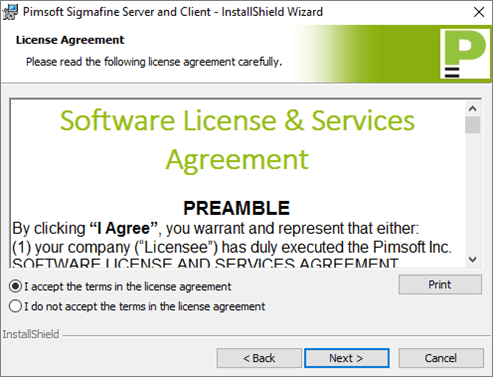
Select the I accept the terms in the license agreement option.
Click Next.
The Customer Information window opens.
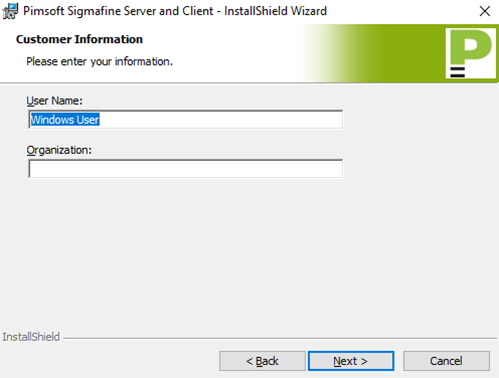
In the user Name box, type the name of the Windows user.
In the Organization box, type your organization's name.
Click Next.
The Destination Folder window opens.
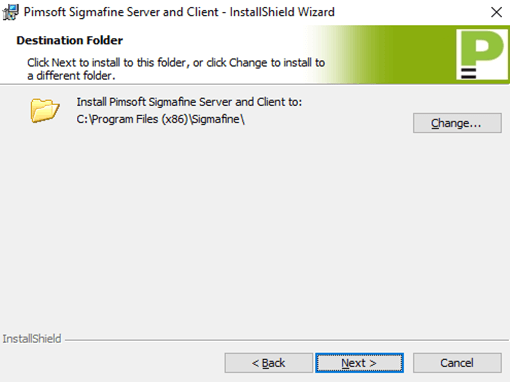
To set the destination folder, click the Change button and select the location you want to use.
We recommend that you use the destination folder that is automatically displayed when you run the kit.
Click Next in the Destination Folder window.
Click Install to continue with the installation.
When the installation completes, click Finish to exit the installation after it finishes.
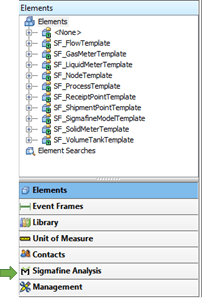
Verify that the Sigmafine installation was correctly installed.
Open the PI System Explorer.
Confirm that the Sigmafine Analysis Rule and Data Reference plug-ins exist.
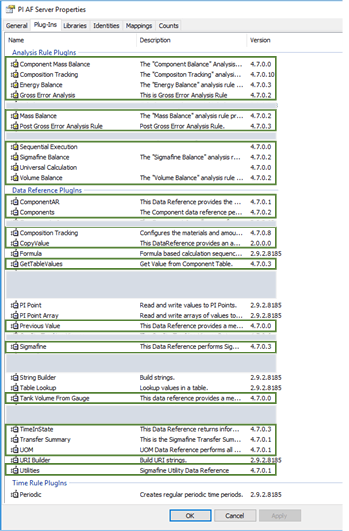
For installations where Sigmafine Client was installed, verify that the Sigmafine Analysis tab is displayed in the left pane.